|
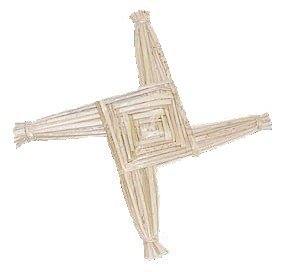
St. Brigid’s Crosses
For a video on You Tube demonstrating this project click here.
During one of her travels, St. Brigid went to visit a dying pagan chieftan. As she sat near his bed, she picked up some rushes on the floor and began weaving a Cross. He asked her about what she was doing and, in explaining, she told him about Christ and the meaning of the Cross. He came to faith and was baptized.
It is customary on St. Brigid’s Day to make a Cross — known as a “St. Brigid’s Cross” — out of rushes or reeds (other materials may be used if no rushes or reeds are available). Once the Cross is woven, it is blessed with holy water and with the words, May the blessing of God, Father, Son and Holy Ghost be on this Cross and on the place where it hangs and on everyone who looks on it.
It is then hung on the front doors of homes and left in place all year, to be burned and replaced with a newly-woven Cross on the next St. Brigid’s Day.
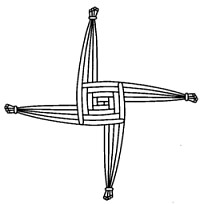
How to make a St. Brigid’s Cross
 |
Get at least 12 pieces of reed or straw (16 is better). Take the shortest one and hold upright. |
 |
Take a second straw and fold it in the middle. |
 |
Wrap the second straw around the first straw at the center so that it opens to your right. |
 |
Pull it tight. |
 |
Rotate the assemblage 90 degrees counter-clockwise, holding it at the center where the straws come together. |
 |
Take a third straw and wrap it around the second straw so that it is opens to your right. |
 |
Pull it tight. |
 |
Rotate the assemblage 90 degrees counter-clockwise, holding it at the center where the straws come together. |
 |
Take a fourth straw and wrap it around the third straw so that it opens to your right. |
 |
Pull it tight. |
 |
Rotate the assemblage 90 degrees counter-clockwise, holding it at the center where the straws come together. |
 |
Take a fifth straw and fold it around the fourth straw so that it opens to your right. |
 |
Pull it tight.
Repeat this process until at least 12 straws are used.
You will always be adding a straw at the top so it opens to your right, then turning the entire assemblage 90 degrees counter-clockwise, and repeating (“Add to the right, turn to the left”).
Secure the ends of the arms of the Cross with twine, elastic, ribbon, etc., and trim the ends of the straws so that they’re even. |
|